Oh man, this is going to be an adventure...lol
🙃The two screens have nothing to do with Platformio, that's just the file browser on a Mac , I am showing what to put where when you unzip the downloaded file from Code Builder
You can actually keep the downloaded Code Builder folder wherever you want, for convenience I've made a folder Documents/Platformio/ and just keep the projects there.
Ok...let me explain, when you set things up in the code builder it will generate a "project template" for the device you've picked.
It will create a folder, give it a name of your device and add sub-folders that are needed so it's recognised automatically by platformio as a single project
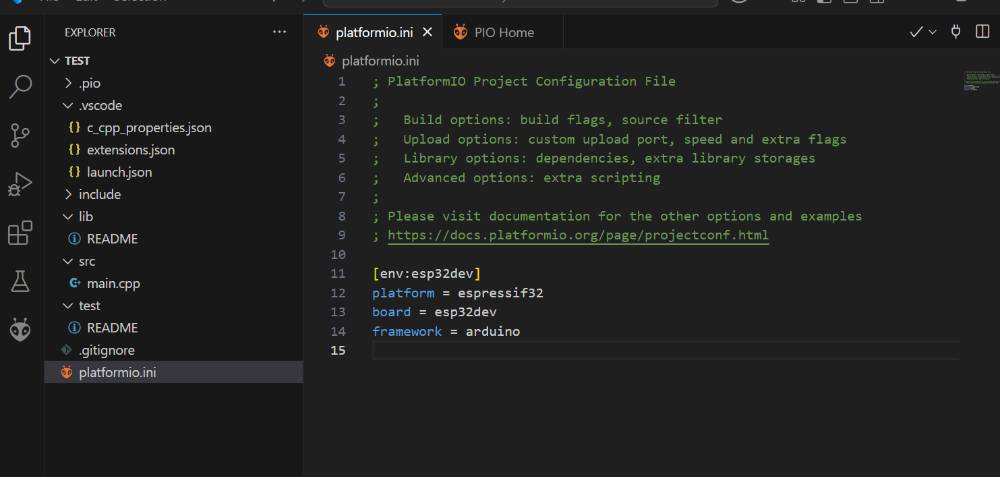
- src > main.cpp - this is your main ".ino" file where you write your code. Code builder will automatically add a lot of code there that is needed for chipchop communication and if you are using any plugins
- lib - this is where any required supporting files live, they are like libraries so for example in the folder "_ChipChop-Engine-1.4x" will be the ChipChop main communication library and will be already linked for use in the main.cpp
- if the project requires any other external libraries they will also go here so the WebSockets library will also be there
- this makes everything self contained and everything is within the main folder - it's the entire device project
- include - usually empty folder but can be used, for additional stuff
- platformio.ini - very important file, it tells platformio what is your device so it can correctly compile and upload the code.
- this is automatically made for you so you shouldn't have to make any changes there unless you want to do something more advanced
so
all you need to do is
1. generate the code template in the code builder, download, unzip and open the unzipped folder through platformio
2. edit the main.cpp (copy and paste the smart led code I've made in the previous post)
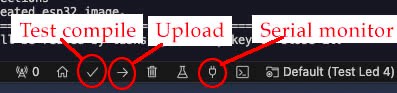
3. press the build (tick) button in the bottom to do a test compile and if everything is ok press the (arrow) to upload the code on the esp
4. press the serial monitor button to observer what's going on (see attached image)
That's pretty much the process.
If you want to use any of the code examples from the tutorials because of this mess with Arduino IDE I will tweak them slightly for you or just follow my instructions in the previous post, it's just keeping the correct #include and the plugins manager also needs to be started and run