ChipChop Support Forum
Log in
Log out
Join the forum
My Details
REPLIES: 21
VIEWS: 101
BACK
REPLY TO THIS POST
Swapfile
23 Jan 2025
How to add button indicator on Phone app.
Hi

From the Smart Button tutorial , the COMPONENT is selected as ON/OFF.

I created 2 components LIGHT and ON/OFF.

But on the Wed App there is now 2 button icons that change when I tap them.

I need a indicator to show the button pressed on the ESP.

LIGHT works fine from Phone to ESP Pin 23.

I need Button from ESP Pin 34 to Phone indicator.

Thanks.


Attached images
Swapfile
23 Jan 2025

The Web App from the Device console does not work anymore , only work from my Phone app.
Buttons keep on disappear from PC web app.

I used a previous working LedTwo project that work also now does not work from Device console Webb app , but still works from my Phone.
Gizmo
23 Jan 2025

oh dear me!

Ok...so... the Web App section in the Dev Console is only for you to chose which buttons you want to see in the my.chipchop.io on your phone, it's a settings section not a control thing :-)

The entire Dev Console is a development design/settings tool where you set things up...yes, you can use the Live Control to control the device but really the web app on the phone is made for the interaction, the phone is most likely always with you and much quicker to reach and use.

Try this, it will make it clearer:

1. Open the ChipChop app on your phone
2. On your PC go to the web app section in the Dev Console
3. Show or hide one of the components on your device and watch the phone, be patient it can take up to 10 seconds and you will see how the app on the phone will adjust the buttons you see

If you hide all buttons in the web app section the entire device will disappear from your phone (you would do that if you have a device that you are currently building and you want to hide it temporarily)
Gizmo
23 Jan 2025

what I meant to say is just select all buttons in the web app section and then use the phone or Live Control
Swapfile
23 Jan 2025

Yes ..o dear me.. I got confused between the Wep APP and Live Control.

I see what you said makes sense now.

What component must I select for a indicator on my Phone as in Smart Switch.

ON/OFF does not work it just creates a second clickable button.

Trigger does not have a Pin configuration.

I dotn know what else to select.
Gizmo
23 Jan 2025

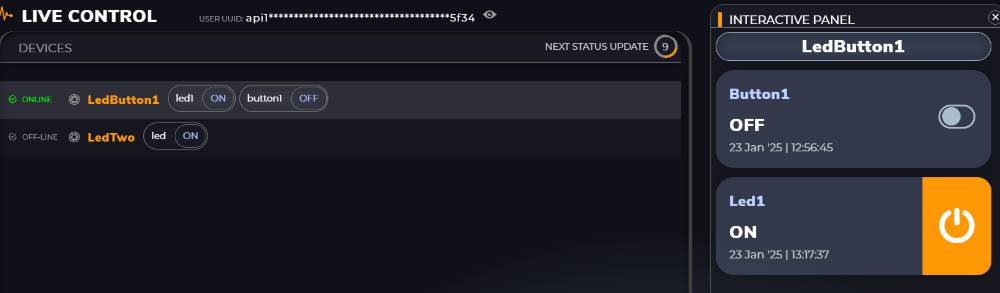
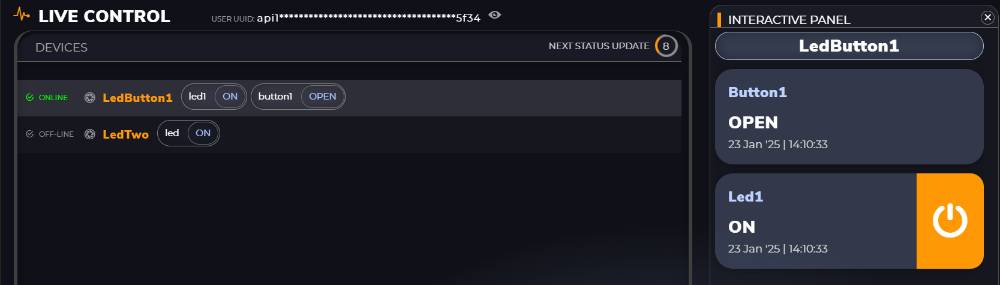
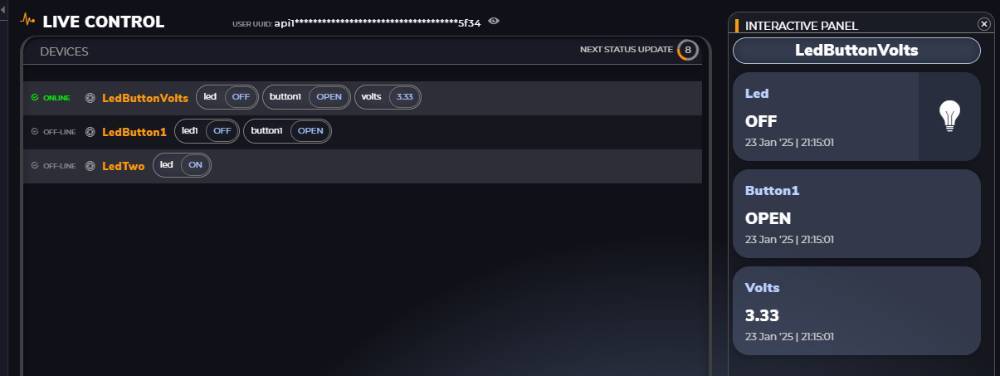
hmmm...if you just want to see the state of the switch but not make it clickable then you can use anything you want (on/off, toggle...) but in the component panel for that switch select "Mode > View Only" (it's probably set as interactive by default which makes it clickable)

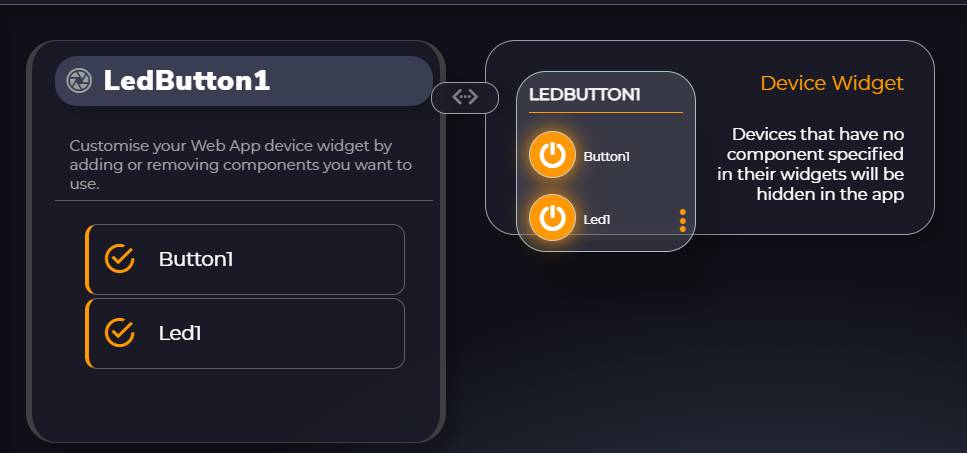
oh, yes, also in the panel that shows different component types you can make your own just click on the "Custom Type" it's above "Preset Types"

With a Custom Type you can chose icons for the "pressed/released" state and also what command words represent those states
The "Pressed" state will also have a glow and background colour.

So for example if you don't want to stick to commands like "ON" or "OFF" you can say "ACTIVE" or "active" or "foo", "bar", "melon" whatever you want and then from the code on the ESP you would send the status for that component with those words

Example

Let's say you want a custom button called "button_1" that will show two states "working" & "paused"

in the esp code you would do


...blah blah

    if(digitalRead(button_pin) == HIGH){
        
        ChipChop.updateStatus("button_1", "working");
        
    }else{
        ChipChop.updateStatus("button_1", "paused");
    }


also, if your custom button is "interactive" when you press it in the app you would get on the device the corresponding custom word that marks the button state


void ChipChop_onCommandReceived(String target_component,String command_value, String command_source, int command_age){

if(target_component == "button_1"){
if(command_value == "working"){


digitalWrite(button_pin, HIGH);

}else if(command_value == "paused"){

digitalWrite(button_pin, LOW);
}

ChipChop.updateStatus("button_1", command_value); // <<< inform ChipChop that you have changed the status so it can update the button on the app interface

}

}


is this what you mean?


Swapfile
23 Jan 2025

Yes ,Thanks.

The Button input must be in only 1 direction from ESP to Phone.

On the Phone it must show something like DOOR OPEN or DOOR CLOSED.

Is there any other Tutorials or Up to date Docs , except the Tutorial Vids.

I know you are planning a big Upgrade and Tutorials .Just asking.
Gizmo
23 Jan 2025

unfortunately there are no more tutorials, what I am working on is sooooo big and has so many new features that it would be pointless me making more videos until it's launched.

For the moment I will be your live human tutorial, just ask what you need.

ChipChop is a huge system, and no matter how much I try to make it simple to use there or try to cover things in tutorials there will always be something not covered or someone will have a different pre-conception how things should be used (anyway, I reckon that ChipChop has probably more usage info than Apple with iOS :-)

For the doors, I use either the "lock" component (commands are "LOCKED/UNLOCKED") or custom with square icons (filled in square and empty square ) and custom commands OPEN/CLOSED.


If you use Mode > View only you won't be able to click on it but even if you leave it interactive it doesn't really matter if you don't implement the logic on the device to do something if it receives a command nothing will happen, the device code will just ignore it.

There is a gazillion different ways how to make it work, for example you could also use a "Button Group" component and label two buttons as OPEN & CLOSED, that would display two buttons in the app, not in the device widget but when you press on the widget and get to the large device details screen


Attached images
Swapfile
23 Jan 2025

Thanks.


I did add > below line ... and also a 10k from pin 34 to 3.3V .. my test button goes to ESP32 GND PIN.


        pinMode(34,INPUT);


Where should I add this below code.? void loop()?


        if(digitalRead(34) == HIGH){
        
        ChipChop.updateStatus("button_1", "working");
        
    }else{
        ChipChop.updateStatus("button_1", "paused");
    }


Swapfile
23 Jan 2025

This my control screen , Button1 is view only.


Attached images
Gizmo
23 Jan 2025

do you want the button to work like:

1. Momentary Button
    
    When your press it it goes "working" but as soon as you release it it goes "paused"

2. Toggle

    When you press and release it goes the opposite state of what it was, so if it was: working > click > paused > click > working > click > paused ...

Like a physical light switch on the wall


Here is a simple code for option 2


const int button_pin = 34;
bool can_change_state = true;
unsigned long last_state_change_time = 0;

String button_status = "paused";

void setup(){


....blah blah

pinMode(button_pin,INPUT); //may need changing to INPUT_PULLUP , depends on the pin

ChipChop.updateStatus("button_1",button_status); //report the status on device wakeup so you know in what state it is

}

void loop(){

....blah blah


if(digitalRead(button_pin) == HIGH){ //button is pressed

if(can_change_state == true){ //ignore the continuous press, only when the button is released this changes to true
if(button_status == "paused"){
button_status = "working";
}else if(button_status == "working"){
button_status = "paused";
}

can_change_state = false; //on the next loop ignore if the button is still pressed
last_state_change_time = millis(); //cache the current change of state time so we can de-bounce it

ChipChop.triggerEvent("button_1",button_status); // send a Trigger Event to ChipChop so it executes instantly

// ChipChop.updateStatus("button_1",button_status); // or if in no hurry send a plain updateStatus

}
}else if(digitalRead(button_pin) == LOW){ //button is not pressed

if(can_change_state == false){
if(millis() - last_state_change_time > 500){ // only execute if the time passed from the last button press is over 1/2 seconds
can_change_state = true; //permit the change on the next button press
}
}

}

}


You may need to reverse the HIGH/LOW checks or the INPUT to INPUT_PULLUP


Swapfile
23 Jan 2025

Aaaaa... success .... I added the pinRead code to void loop() and change to the LOCK component.

Now I get LOCK or OPEN when the button is pressed or released.

As you can see in the above line the button is a non locking push button.

1.Smart_Led ... done.

2.Smart_Button ... done.

3.Smart_Led and Smart_Button combined on 1 Device.

4. Next .. analogRead ???


Attached images
Gizmo
23 Jan 2025

Do you have 2 esp boards?

You could then have a play with Actions so when you press a button on one esp the led on the other one lights up

If not, yeah, analog read is good, for that you will probably want to use numeric components or sliders
Swapfile
23 Jan 2025

I have more than 1 ESP , I never buy just one of any board.

The first one is R&D and I try not to blow it up.

For now my next goal is battVoltage display.

Connecting 2 ESP sounds like fun.

Swapfile
23 Jan 2025

Led , button , volts on 1 device.

Reading the 3.3V pin on the ESP.

I also put a jumper on my board to select between 2 wifi's so now I don't have to reprogram the ESP if I move from 1 wifi to the other.

I see we now have wifi settings in the code builder ... cool.


Attached images
Gizmo
23 Jan 2025

Great stuff!

Yes, I've made a WiFi Portal plugin. It may need upgrading at some point in the future but it's been working fine as it is.

If you integrate it in the code then in the setup() you specify an initial wifi ssid/pass but if you change the wifi (move the esp) it will fire up it's own hotspot and you connect to it from your phone, wait a little bit and it will bring a page to select a new ssid.

Once it successfully connects to a new ssid it will remember it (there is no limit how many it can remember just the flash memory :-) so if it loses the wifi it will scan what is available and if it recognises one from it's remembered list it automatically connects to it.

Does some other stuff in the background and works in tandem with the KeepAlive and the ChipChop engine to try and maintain the connection

Swapfile
24 Jan 2025

Thanks for the WiFi Plugin I will play with it.

My WiFi jumper selector works , I am at my second WiFi and the ESP connect when the jumper is removed .. no more reprograming.

Gizmo
24 Jan 2025

Nice :-)

Here's a little practice idea, you can kinda emulate the jumper or use it as backup option (for example you put the esp in a box so the jumper may be hard to reach) you can add another component in the Dev Console of type "Button Group" call it "wifi" and add buttons with labels : "WiFi 1" & "WiFi 2"

Then in the code you listen for a command that is for target component "wifi" and depending on the value "WiFi 1" or "WiFi 2" you run the same function that gets triggered when you use the jumper.

I guess you would have to do this "before" you move the device to a different wifi to prepare it for the change


void ChipChop_onCommandReceived(String target_component,String command_value, String command_source, int command_age){

    if(target_component == "wifi"){
        if(command_value == "WiFi 1"){

            //call the jumper function to switch to wifi 1

        }else if(command_value == "WiFi 2"){

            //call the jumper function to switch to wifi 2
        }

        ChipChop.updateStatus("wifi", command_value); // <<< inform ChipChop that you have changed the status so it can update the button on the app interface

    }

}


The WiFi Portal plugin kinda solves all this but it's a great idea to have a hardware option with the jumper or extra button/switch, I may consider this in the future, it would definitely make things more robust

Swapfile
24 Jan 2025

Interesting.

My jumper option only works on power restore , WiFi connect is in setup.
But that is fine I have a workable work around.

You are moving faster than what I can update my hand written Tutorial.

Last night 22h00 only the WiFi plugin was add with <NAME> and <PASSWORD>

This morning 07h00 you already change the WiFi plugin with new option.

and

Also a few more Plugins.

Some extra function for the WiFi will be nice to have.
Use the onboard LED pin2 for WiFi connected indication.


Gizmo
24 Jan 2025

just a quick reply, I am about to go out for a meeting

the led indicator used to be in the code but too many people too many opinions and too many pins and boards so I removed it but if you find that the wifi portal works for you I'll write you the code for the led, it's 2 min job

need to dash


G
Swapfile
24 Jan 2025

I think in most cases the Device will not move if it is installed on site and hard wired to Door switches etc...

The only reason I added the WiFi selector is that I am moving between 2 WiFi's and dont want to reprogram every time.

The WiFi Plugin is very usable if a client does not want to give out his <NAME>,<PASSWORD> then he can set it up himself.

I did try the WiFi Plugin ... not sure what I did wrong.

1. Find ESPXXXXX on Phone connections.

2.Pop up message to sign in ... tap on that.

3.Searching.

4.In the serial Monitor it does show a list of available WiFi's

5.Never got a list to select on my Phone.

6.Disconnect ... everything stops.


Gizmo
24 Jan 2025

hmmm, interesting, I've just done a completely clean compile and it definitely works both on Android & iPhone but it is very very very slow on Android to get going.

I can see that there was also some change on android and the phone sends an extra request, it doesn't affect the program but probably slows things down or interrupts the scan for the ssids around

I've already had to add more checks last year when Apple added some new requests when opening a captive portal...grrrr

Ok, leave it with me and I'll do some testing. If you can try couple more times, it would be good to know if it's a consistent behaviour, I use Samsung Galaxy s24 and iPhone 12 on iOS 18